
Last update: 4 days ago
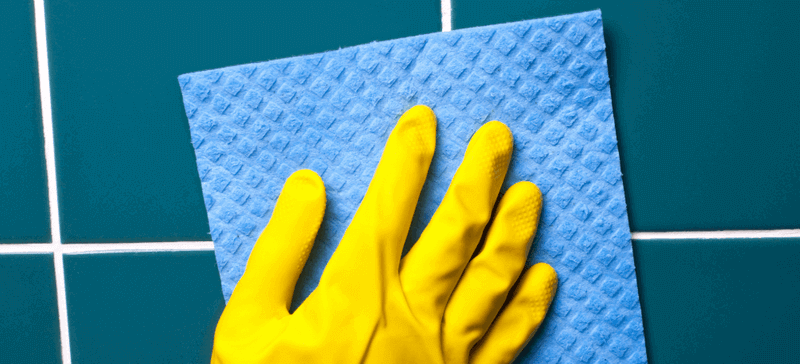
To clean grout effectively, you need to match your cleaner to the level of staining — baking soda and vinegar for light grime, hydrogen peroxide for moderate discolouration, and bleach or a commercial cleaner for heavy buildup or mould. The same approach works whether you’re tackling shower grout, floor tile grout, or kitchen splashbacks. It seems like a lot to tackle, but the good news is that all of it can disappear fast with just a little elbow grease and the right method.
How to clean grout: step-by-step
- Prepare the area properly
This is the bit most people rush… and then wonder why the grout still looks dirty after all that effort.
Before you touch any cleaner, you need to get rid of the loose dirt sitting on the surface. Dust, crumbs, hair — all of it. If you skip this, you’ll just end up rubbing that grime straight into the grout when you start scrubbing. Not ideal.
Start with a quick sweep or vacuum, paying a bit of attention to the grout lines. You don’t need to be obsessive, just thorough enough to clear the obvious debris. After that, give the tiles a light wipe with a damp cloth or mop. This lifts any surface film and stops your cleaner from getting diluted by loose dirt.
If you’re working in a bathroom or kitchen, take a minute to clear the space as well. Move rugs, bins, bottles — anything that’s going to get in your way. It sounds basic, but having proper access makes the whole job quicker and less frustrating. - Choose the right grout cleaning method
This is where most people get it wrong. They jump straight in with whatever they’ve seen online — usually baking soda and vinegar — and hope for the best.
Sometimes that works. Sometimes it barely touches the problem.
The truth is, grout doesn’t get dirty in just one way. Bathroom grout tends to deal with moisture and mould. Kitchen grout picks up grease and food residue. And older grout? That’s usually a mix of everything, baked in over time.
So before you grab a cleaner, take a proper look at what you’re dealing with.
• Light dirt or slight discolouration — This is the easy stuff. A simple baking soda paste or mild cleaner will usually sort it without much effort.
• Moderate staining or dull-looking grout — Now you’ll need something a bit stronger — hydrogen peroxide or a more active cleaning solution tends to work better here.
• Black grout, mould, or heavy buildup — This is where you stop being gentle. You’ll likely need bleach, a commercial cleaner, or an alkaline solution to actually break it down.
It’s not about using the strongest product straight away. It’s about using the right one. Go too mild and you’ll waste time. Go too harsh, and you risk damaging the grout for no reason.
Get this step right, and everything that follows becomes much easier. - Apply your cleaner — best ways to clean grout
This is where the real change happens. Get this step right, and you’ll see the difference almost immediately. Get it wrong, and you’ll just be pushing dirt around.
There’s no single “best” cleaner for every situation. It depends on how bad the grout is — light dullness, deep stains, or full-on mould all need slightly different approaches.
Here are the methods that actually work. - Rinse and remove residue
You’ve done the hard part. Scrubbed, sprayed, probably got a bit fed up halfway through. But here’s the thing — all that loosened dirt and leftover cleaner is still sitting there. Leave it, and it dries right back into the grout or leaves that slightly cloudy film on the tiles. You know the look. Still dull, just… cleaner-ish.
Start simple. Grab a clean cloth or sponge and dampen it. Not dripping. Just enough to pick things up properly. Wipe over the area, then rinse your cloth. Do it again. If you don’t rinse it, you’re basically just moving dirty water around. Bit pointless.
Got a bigger floor? A light mop will save your back. Just don’t flood it. Too much water pushes everything straight back into the grout lines, which undoes half your work. Keep it controlled.
You might need a second pass, especially if you used something stronger like bleach. That stuff likes to hang around. Take an extra minute here — it genuinely shows in the end result. - Repeat or spot-treat stubborn areas
You’ve cleaned, scrubbed, rinsed… and some grout lines still look darker than others. Completely normal. Especially if the grout hasn’t been touched in months (or years).
Instead of going over the whole area again, focus on the problem spots. Take a closer look and pick out the sections that didn’t respond properly. These usually fall into two categories — deeper stains or areas where grime has built up over time. Either way, they need a second pass.
Reapply your cleaner directly to those spots and give it a bit more time to work. This is where patience pays off. Letting the solution sit for longer often does more than aggressive scrubbing ever will.
Then go back in with your brush and work those areas again, using the same steady pressure as before. No need to go harder — just more targeted.
If you’re still not seeing much improvement after that, it’s a sign you may need to switch methods. For example, move from baking soda to hydrogen peroxide, or from peroxide to a stronger solution like bleach or a commercial cleaner. Some stains simply won’t lift with mild products, no matter how many times you try.
And finally, if certain grout lines stay discoloured no matter what you do, it might not be dirt anymore. It could be permanent staining or wear, which cleaning alone won’t fix. - Dry the area and check the results
This is the bit people skip… then panic five minutes later.
Grout always looks darker when it’s wet. Always. It can trick you into thinking the whole job’s failed, or the opposite — that it’s spotless when it really isn’t. Seen both. Neither is helpful.
So, dry it properly. Grab a clean towel or cloth and go over the tiles and grout lines. No need to fuss over it like you’re polishing glass. Just get rid of most of the moisture. If it’s a bigger space, open a window and let it air dry. That works just fine.
Once it’s mostly dry, stop and actually look at it. Not a quick glance. A proper look. You’re checking for anything that stands out — patches that still look darker, bits you clearly missed, areas that feel a bit dull like they didn’t quite come back. Most of the time, it’s not a full redo. Just a few stubborn lines that need another quick go.
If the grout looks lighter, more even, less patchy overall — job done. It doesn’t need to look brand new. It just needs to look clean enough that you don’t notice it anymore. That’s when you know you’ve got it right. - Protect and keep grout clean
Given that every homeowner wants to clean the grout as little as possible, there aren’t that many ways you can protect it from getting stained.
The best way to seal grout is to use a latex penetrating grout sealer. They’re pretty inexpensive — generally under $15 at most hardware stores. Most times, with regular use in the bathroom, you’ll want to re-seal the grout once a year. You can go for as long as a year and a half to two years in the kitchen, depending on how often you cook and use the tiled area.
Follow the instructions on the back of the product for best results. You’ll often have to put a bit of elbow grease to clean the grout first and then seal it.
Of course, practical habits will also help with keeping grout clean. What we suggest is to try and mop water from tiles every chance you get. It’s best to leave a window open or keep a fan working after showering to suck the room’s moisture. If not done, you may soon find mould and mildew forming in your bathroom.
Cleaning grout with baking soda & vinegar
A popular grout cleaning solution, this recipe can help you get rid of mild staining and refresh the area from time to time.
What you will need:
- Baking Soda
- Vinegar
- Spray Bottle
- Grout Brush (or a Toothbrush)
- Hydrogen Peroxide (Optional)
How to clean grout with baking soda and vinegar:
- Start by preparing the vinegar solution. Mix 1:1 warm water and vinegar in the spray bottle.
- Spray the grout and leave it to sit for about 5–10 minutes. Then rinse well.
- Follow up with a baking soda paste, made by mixing a little bit of water with the bicarbonate of soda. Adding a small amount of hydrogen peroxide creates a stronger whitening paste — this is the best approach if you’re specifically trying to clean white grout or restore discoloured grout back to white.
- Apply the paste on the grout and use the brush of choice to clean the dirt buildup. You can either leave the paste on for a few hours or scrub right away.
If you are looking for a way to clean your grout naturally, then this is the thing to try. Vinegar is suitable for general disinfection and for killing nasty mould. The baking soda and hydrogen peroxide paste is particularly effective for how to make grout white again — the hydrogen peroxide lifts staining while the baking soda provides gentle abrasion. The good news is that you can save yourself some scrubbing if you decide to leave the paste on the grout for as long as possible.
Homemade grout cleaning solutions are often preferred, but keep in mind that you may have to play around with different ingredients until you find the one that works for you. Also, they may not work as well on your first attempt and may require several applications.
Cleaning grout with bleach
If you are dealing with a very dingy and stained grout, then bleach can make a difference. While it can get mildew and spots out of the grout, bleach can also be toxic, which is why we recommend you stick to oxygen bleach. The latter is considered more beneficial for the environment, as hydrogen peroxide is one of the main ingredients. Nevertheless, it is still essential to take precautions — experienced cleaners know all about that.
What you will need:
- Safety glasses
- Gloves
- Mask
- Toothbrush
- Oxygen bleach
How to clean grout with bleach:
- Put on your gloves and the rest of the safety gear.
- Apply a small amount of the bleach and start scrubbing.
- Let it stay on for 10 to 15 minutes.
- Rinse several times with water until the product is fully removed.
Using chlorine bleach to clean the space between the tiles isn’t uncommon. However, this product is highly toxic and can even damage the grout when mishandled.
Commercial grout cleaner
If you want to save yourself time from preparing a grout cleaning solution, a commercial grout cleaner is worth reaching for — particularly when DIY methods have failed or the grout is heavily stained. Purpose-made grout cleaners like those from Selleys or HG Grout Cleaner are formulated to break down mineral deposits, soap scum, and deep discolouration that milder homemade options can’t always touch.
They are a bit more expensive and sold in larger quantities, but the upside is you’ll have a grout cleaner on hand for months ahead. We would suggest that you use a commercial grout cleaner if you are just moving into a property. That way, you will clean the tiled areas as best as possible.
Alkaline detergents for grout cleaning
If the staining isn’t too severe, you may want to try easy-to-find detergents that are alkaline. In short, this is any widely sold cleaning detergent that has a pH greater than seven on the pH scale.
Depending on where you reside, different brands will offer alkaline cleaners. It’s the easiest way to clean grout. However, depending on the amount of staining, you may need a stronger solution to get that sparkling white look back.
Maintaining spotless grout isn’t an easy task. It’s best if you don’t let things get out of control by doing a regular cleaning. If you are just moving in, and things are way worse than you expected, we would suggest that you get the help of a professional tile and grout cleaner, as this may be the only way to get your grout looking perfectly white again.
What not to use when cleaning grout?
Some things sound like a smart shortcut… right up until they make the grout look worse.
Take harsh acidic cleaners. Vinegar gets recommended everywhere, but it’s not always your friend. On natural stone like marble or granite, it can leave dull marks that don’t come back out. If you’re not sure what your tiles are made of, don’t guess. That’s how people end up with bigger problems than dirty grout.
Metal brushes are another one. They feel like they should work better, but they’re too aggressive. You’ll scratch the tiles, wear the grout down, make it more likely to stain again. Bit of a false win.
Mixing products? Just don’t. Especially bleach with anything else. It’s not clever, it’s risky. No clean tile is worth that.
And yes, strong chemicals do work. Bleach, heavy-duty cleaners, all that. But using them all the time slowly wrecks the grout. It fades, weakens, and starts looking patchy.
Simple rule — don’t go nuclear unless you actually need to. You’re trying to clean the grout, not fight it.
How to make grout white again
The most effective way to whiten grout is a paste made from baking soda and hydrogen peroxide — apply it directly to the grout lines, leave it for at least 30 minutes (or longer for stubborn staining), then scrub with a stiff grout brush and rinse thoroughly.
Hydrogen peroxide works as a mild bleaching agent and lifts the yellowing or grey discolouration that builds up over time. The baking soda adds gentle abrasion to help loosen grime without scratching the surrounding tile. For particularly stubborn areas, you can leave the paste on for a few hours — it won’t damage the grout and often produces noticeably better results than a quick scrub.
Once the grout looks white again, seal it. A latex penetrating grout sealer locks out moisture and staining agents, which means your freshly whitened grout stays that way for considerably longer. Skipping the seal is one of the main reasons grout discolours again within weeks.
How to clean shower grout and floor tile grout
How to clean shower grout
Shower grout has a harder life than most. It’s constantly wet, rarely fully dries out between uses, and soap scum builds up fast — which makes it prime territory for mould and mildew. That pink or black discolouration you see along the grout lines? That’s biological growth, not just dirt, and it needs a cleaner that actually kills it.
For how to clean grout in the shower, a baking soda and hydrogen peroxide paste is your best starting point — it whitens, kills mould spores, and is safe to use on most tile types. For heavier mould, oxygen bleach is the more effective option. Apply it, let it sit for 10–15 minutes, scrub along the grout lines with a narrow brush, then rinse well.
After cleaning, ventilate the bathroom properly — open a window or run the exhaust fan. Moisture left sitting in the grout after cleaning is what starts the whole cycle again. It’s worth the extra two minutes.
How to clean grout on floor tiles
Floor tile grout deals with a different kind of mess — foot traffic, tracked-in dirt, and ground-in grime that packs into the grout lines over time. It tends to discolour more gradually than shower grout, but it covers a much larger area, which makes it feel more overwhelming when you finally get around to it.
For cleaning floor grout, an alkaline detergent or commercial grout cleaner works well — both are designed to cut through the greasy, compacted dirt that regular mopping misses. Apply the cleaner along the grout lines, let it dwell for a few minutes, then work a stiff brush along each line before mopping up with clean water. Avoid flooding the floor — controlled application gives better results and stops dirty water from re-settling into the grout.
For large areas like kitchen or laundry floors, working in sections keeps it manageable and stops the cleaner from drying before you’ve had a chance to scrub.
Frequently asked questions
Yes — steam cleaning is one of the most effective methods for grout lines, especially in showers. The high heat breaks down mould, soap scum, and grease without needing any chemicals at all. Use a narrow nozzle attachment to direct the steam precisely along the grout lines for the best results. It’s particularly useful for regular maintenance cleaning where you want to avoid chemical build-up over time.
For bathroom grout, a light clean every one to two weeks (wiping down tiles after showering, for example) keeps mould and soap scum from taking hold. A proper deep clean every one to three months is usually enough for most households, depending on usage. Kitchen floor grout can typically go a bit longer between deep cleans, but high-traffic areas like entryways may need more frequent attention.
Need help with other cleaning tasks?
See how we can help!
Takeaways
- The right method matters more than the strongest cleaner – match your approach to how dirty the grout actually is.
- Preparation and rinsing make a bigger difference than most people think – skip them and results suffer.
- Scrubbing technique beats brute force – steady, controlled cleaning works better than aggressive effort.
- Some stains won’t fully come out – and that’s normal, especially with older grout.
- Sealing grout helps keep it cleaner for longer – and reduces how often you need to deep clean.