Most people assume deep cleaning a bathroom requires a full day, industrial-strength products, or someone who does it for a living. That belief alone is probably why so many bathrooms only get a proper clean twice a year at best. The truth is, the barrier isn’t effort. It’s knowing what you’re actually dealing with and what works on it.
This post walks you through how to deep clean your bathroom properly, with specific attention to the hard water issues that affect so much of Australia. If you’ve ever scrubbed a tap for ten minutes and barely touched the limescale, you’ll understand why technique matters more than elbow grease. Here’s how to get it right.
TL;DR
- Start from the top and work downwards to avoid re-soiling cleaned surfaces.
- Use acid-based descalers or white vinegar to dissolve mineral deposits from hard water.
- Grout and tile lines need a dedicated scrub — general sprays won’t cut through built-up grime.
- Ventilation is essential both during cleaning and as an ongoing habit to prevent mould.
- Regular maintenance between deep cleans makes the next one significantly faster and easier.
How Do You Deep Clean a Bathroom Efficiently?
Deep clean your bathroom by working top to bottom, applying the right cleaning agent to each surface type, and leaving products to dwell before scrubbing. Gather your supplies first, ventilate the space, and tackle dry debris before bringing in any liquids.
The order matters more than most people realise. If you mop the floor and then wipe down shelves, the debris from the shelves falls onto your clean floor. If you spray the shower before dusting the ceiling vent, that dust lands on your wet surfaces. Everything feeds down, so you clean from the top down. Always.
- Gather your supplies
You’ll need microfibre cloths, an old toothbrush or grout brush, white vinegar, bicarbonate of soda, a descaling solution, a toilet brush, a squeegee, and a bucket. Having everything within reach before you start means you’re not stopping mid-job to hunt through cupboards.
- Ventilate the space
Turn on the extractor fan or open the window fully. Some cleaning products release fumes in enclosed spaces, and you’ll want airflow throughout the entire session. This is especially important when using descalers or anything acid-based.
- Start dry — dust and sweep first
Use a dry microfibre cloth or a duster to wipe down light fittings, the top of door frames, the extractor fan cover, and any shelving. Sweep or vacuum the floor before any liquids go down. Getting rid of dry debris first means it doesn’t turn into wet sludge when you start washing.
- Apply cleaning products and let them dwell
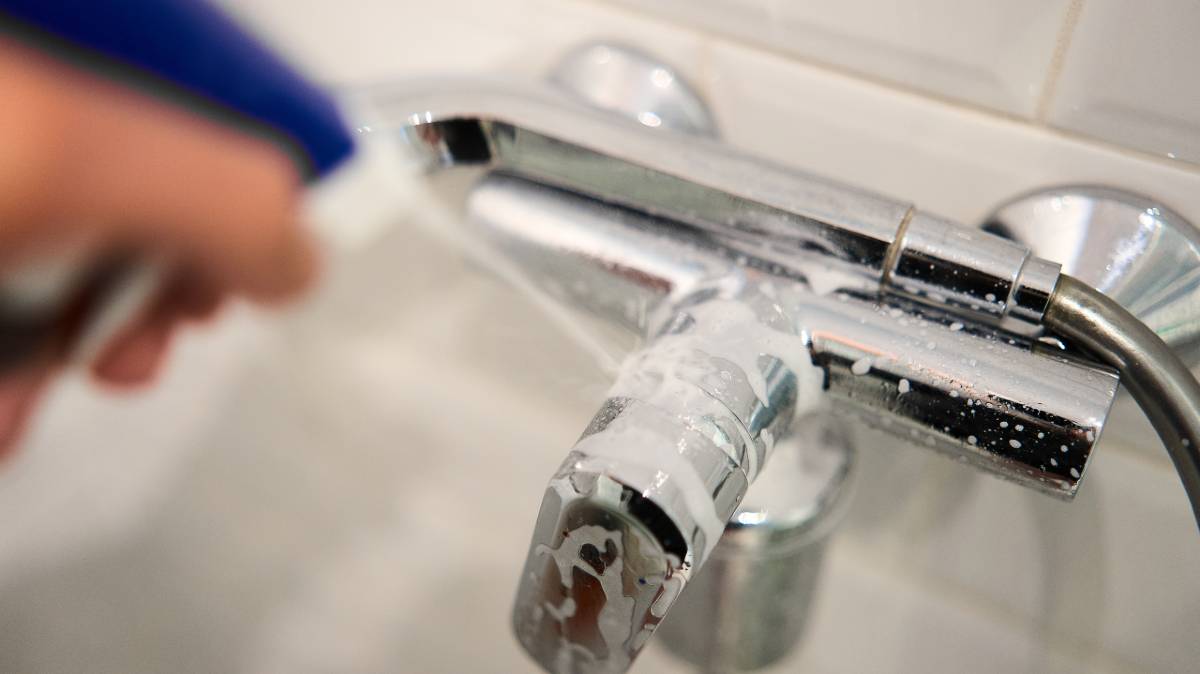
Spray the shower walls, tiles, and bath with your cleaner. Apply descaler to taps, showerheads, and around the base of fixtures. Squirt toilet cleaner under the rim and leave it. The dwell time is doing the actual work — you’re giving the chemistry time to break down the grime before you scrub.
- Scrub grout lines and tile surfaces
Mix bicarbonate of soda with a small amount of white vinegar into a paste and work it into the grout with a stiff brush or old toothbrush. Scrub in short strokes. Grout is porous and holds discolouration deep in the material, so a light wipe won’t cut it. Rinse thoroughly after scrubbing.
- Clean the toilet thoroughly
Scrub under the rim first, then work the brush around the bowl. Wipe down the exterior — the cistern, the base, and the area around the base, which collects more grime than most people clean. Use a separate cloth for the toilet to avoid cross-contamination with other surfaces.
- Rinse and wipe all surfaces
Rinse the shower, tiles, and bath with clean water, then dry with a microfibre cloth. Drying removes water spots and stops fresh limescale forming immediately after you’ve cleaned. Buff taps and showerheads dry to finish.
- Clean the floor last
Mop or scrub the floor once everything above it is done. Pay attention to the area behind the toilet and the edges where the floor meets the wall — these spots accumulate grime fast and are easy to miss.
The Advantages of a Zone-by-Zone Cleaning Method
Trying to clean an entire bathroom all at once — bouncing between the toilet, the shower, the sink, and the floor — leads to half-finished surfaces and products drying out before you’ve had a chance to wipe them. A zone-based approach fixes that.
Divide the bathroom into three distinct zones and complete each one before moving on. It keeps your focus sharp and means you’re not cross-contaminating surfaces with the same cloth.
- Shower and bath zone – This includes the walls, screen or curtain, floor of the shower, and all fixtures. Apply your products here first so they can dwell while you work elsewhere, then come back to scrub and rinse;
- Sink and vanity zone – The basin, taps, mirror, and any surrounding benchtop or cabinetry. This area tends to accumulate toothpaste residue, soap scum, and water spots. The mirror gets cleaned last in this zone so you don’t smear it with products from your hands;
- Toilet zone – The bowl, under the rim, the seat (top and underside), the cistern, and the full exterior including the base and the floor directly around it. Use dedicated cloths for this zone only and dispose of or wash them separately;
- Floor zone – Always last. The floor catches debris from every other zone, so cleaning it before everything else is finished just means cleaning it twice;
This method also makes it easier to track what’s been done. When you’re working room-wide, it’s easy to forget whether you actually scrubbed the grout in the second row of tiles or just sprayed it. Zone by zone, you know exactly where you’re up to.
Why Is Hard Water Such a Problem in Australian Bathrooms?
Hard water is water with a high concentration of dissolved minerals, primarily calcium and magnesium. When it evaporates off your taps, showerhead, tiles, or bath, those minerals stay behind. That white, chalky residue is limescale. It builds up with every shower, every drip, every splash. In many parts of Australia, particularly in Perth and Adelaide where water hardness levels are notably high, this is an ongoing battle rather than an occasional inconvenience.
The key thing to understand is that limescale isn’t dirt. It’s a mineral bond. Standard bathroom spray and a cloth won’t touch it because those products aren’t designed to dissolve minerals. You need an acid. White vinegar works for light to moderate buildup. Citric acid is a step up. For heavy scaling around showerheads or tap bases, a dedicated descaling product left to dwell properly is the most effective option.
Here’s a simple guide to matching the solution to the problem:
| Buildup Level | What It Looks Like | Best Approach |
|---|---|---|
| Light | Faint white film, wipes away easily | White vinegar spray, 5–10 minute dwell |
| Moderate | Visible crusty deposits, rough to touch | Citric acid solution or stronger vinegar soak, 20–30 minutes |
| Heavy | Thick, layered scale, discoloured fixtures | Commercial descaler, extended dwell, may need repeat treatment |
One practical trick: soak a cloth in white vinegar and wrap it around a limescale-crusted tap. Leave it for 30 minutes to an hour. The acid slowly dissolves the calcium bonds without you having to scrub. For showerheads, fill a bag with vinegar, tie it around the head so the nozzles are submerged, and leave it overnight. You’ll be surprised what comes loose.
How to Keep Your Bathroom Clean Between Deep Cleans
A deep clean doesn’t stay that way on its own. What you do in between determines how hard the next one is. The good news is that daily bathroom cleaning habits take very little time and dramatically slow down the rate at which grime builds up.
- Squeegee the shower screen after every use – Takes about 20 seconds and prevents soap scum and water marks from bonding to the glass. The difference over a week is dramatic;
- Quick daily wipe of the basin and taps – A damp microfibre cloth takes 60 seconds and stops toothpaste and soap residue from hardening into something that needs actual scrubbing;
- Use moisture absorbers or silica packs – In smaller bathrooms without great ventilation, these help manage ambient humidity between uses, which slows mould growth on sealant and grout;
- Leave the extractor fan running after showers – Most fans should stay on for at least 15–20 minutes after the bathroom has been used. Switching it off the moment you leave traps moisture in the room;
- Check sealant and grout regularly – Catch mould early, when it’s surface-level, and it comes off with a targeted spray and a scrub. Leave it and it penetrates the material, at which point replacement is often the only real option;
- Fix leaks promptly – A dripping tap or a leaking pipe connection behind the basin creates the persistent moisture that mould needs. The cleaning problem is downstream of the plumbing problem;
If you’re managing a property with multiple bathrooms or simply don’t have time to stay on top of everything, a one-off cleaning service covers the full property in one session, handling areas that routine cleaning tends to skip over. Worth knowing about for those periods when life gets busy.
Need your bathroom deep cleaned today?
Fantastic Cleaners is on its way!
Frequently Asked Questions
Remove the cover and soak it in warm soapy water for a few minutes. Use an old toothbrush to dislodge dust from the vents. Dry it completely before reattaching — moisture left in the housing can encourage mould growth around the fan unit. Clean the cover every 2–3 months as part of your regular deep clean routine.
For an average-sized bathroom in reasonable condition, expect around 1.5 to 2.5 hours. A bathroom that hasn’t been deep cleaned in several months — particularly one with heavy limescale or stained grout — can take considerably longer. Building in dwell time for cleaning products means you can work on one area while another is soaking, which helps manage the overall time.
A microfibre cloth, a squeegee, a spray bottle with diluted white vinegar, and a toilet brush cover the essentials. These four tools handle the most common between-clean tasks: glass and surface wiping, water mark prevention, light descaling, and toilet hygiene. You don’t need a cupboard full of products — you need the right ones used consistently.
Conclusion
Deep cleaning a bathroom isn’t complicated. It just requires the right order, the right products on the right surfaces, and enough patience to let those products do their job before you start scrubbing. Work top to bottom, zone by zone, and you’ll cover everything thoroughly without doubling your effort. Hard water is a real challenge in many parts of Australia, but white vinegar, citric acid, and a proper dwell time handle it without any need for harsh chemicals or expensive tools.
The bigger win is what you do between deep cleans. A squeegee after every shower, a quick wipe of the basin, and decent ventilation habits will slow down grime accumulation significantly. When the time comes to deep clean your bathroom again, you’ll be starting from a much better position.