Last update: 3 months ago
The kitchen is probably the most important room of any home. All the meals are prepared here and if you are the one doing all the cooking, you want it to look and feel nice. Kitchen organisation is very important for that reason, as, otherwise, things can easily devolve into a cluttered mess.
This is why we made this guide of kitchen organisation ideas for you. Mind that how and where you store your belongings depends on your personal style and how you use the kitchen, but we’ve broken down the process in a few general steps to make it easier on you.
We also included a few tips and tricks to help you streamline your kitchen storage. So, without further ado, let’s get started!
Step 1: Declutter the cabinets
The first step in arranging your kitchen is to declutter your cabinets. You may occasionally be shocked at how much unneeded stuff you hold onto.
To make everything easier to see and organise, go through all the cupboards and place everything on the floor. Only things that you use frequently or that you truly feel hold unique meaning for you should be kept.
Make 3 piles:
- Use often – items you reach for every week.
- Rarely use – items for special occasions or seasonal cooking.
- Let go – broken, expired, duplicate, or forgotten items.
Check expiry dates on food, spices, and condiments. Anything that is past its expiration date or that smells or appears strange should be thrown out. Keep the best cookware and utensils and donate the rest. Three can openers and five spatulas are not necessary.
Once finished, wipe the cabinet shelves. By the way, the kitchen is the first place to start with when you want to declutter your home.
Step 2: Create and put a simple system in place
Now that everything is on the floor, think about how to group these items. This will improve the cohesiveness of your system.
Start with broad categories, such as:
- Baking items (mixing bowls, measuring cups, baking trays)
- Cooking tools (spatulas, tongs, utensils)
- Cutlery
- Everyday plates and bowls
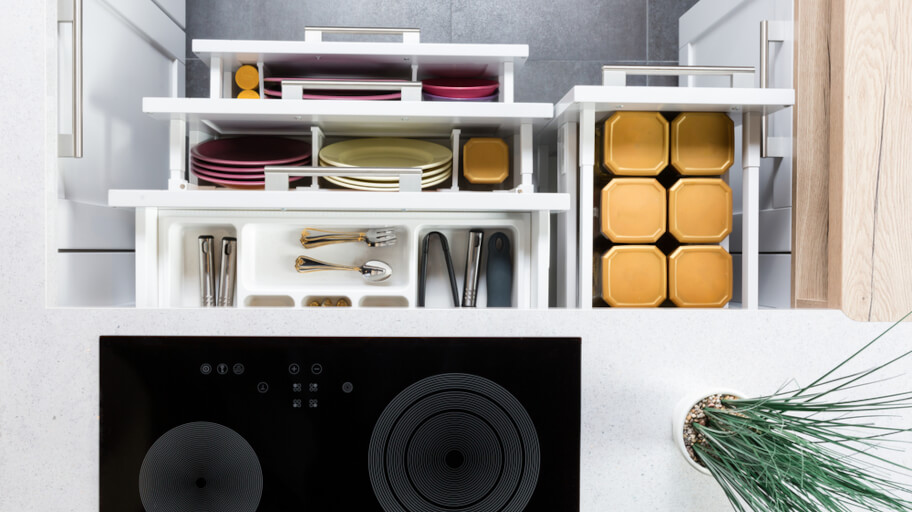
Once your groups are set, return the items to the cabinets by group. Use containers to keep loose items together. Examples are ingredients, sauce mixes, hot cocoa packets, or baking supplies. This saves time and reduces the need for frequent decluttering.
Drawer dividers work well for smaller items and packets. They keep everything visible and in place. Choose sizes that fit your drawers so nothing shifts around.
In the pantry, label all containers so you can quickly see what’s inside and avoid buying duplicates. For extra control, add a small whiteboard to track what you have and note expiration dates.
Step 3: Use containers to control clutter long term
Containers are not just about making cabinets look tidy. Their real job is to stop clutter from creeping back in. They are how you How to organize your kitchen for efficiency
At this stage, your system is already in place. Containers now just help you hold the limits. When a container is full, that is your signal that something needs to go before anything new comes in.
Use clear containers for items you check often, such as dry goods, snacks, or baking ingredients. You need to be able to see what you have. It helps prevent overbuying and forgotten food at the back of the cabinet.
For deep shelves or high cabinets, use bins or tubs instead of loose stacks. These act like drawers. They let you pull everything out at once rather than dig around. Keep one category per container to avoid mixed clutter.
Avoid containers that are too large. Oversized bins invite overfilling and make it harder to keep things organised. Smaller containers naturally limit how much you keep and are easier to maintain.
Finally, keep similar containers together. Matching shapes stack better, waste less space, and make cabinets easier to reset after use. The simpler the setup, the more likely it is to stay that way.
Step 4: Use vertical space
Vertical space is overlooked by everyone, and that’s sad, because it can take a lot of pressure off crowded cabinets and drawers. When you move storage upward, shelves and benchtops stay clearer and easier to use.
Start with the area under your wall cabinets. There, you can install hooks or rails to hang items you reach for often. Examples include pots, pans, stirring utensils, or oven mitts. Mugs also work well here, especially if you have a small collection you use daily. When you hang them it frees shelf space and adds a bit of character to the kitchen. You can easily check Pinterest for examples.
Pantry and cabinet doors are another missed opportunity for many. Put sturdy sticky hooks or slim racks on the inside of doors. They will hold lightweight items like measuring cups, small utensils, or tea towels. This keeps them visible and easy to grab without taking up shelf space.
If you have empty wall sections, consider narrow wall shelves or a pegboard. These are ideal for tools you use frequently and help keep work surfaces clear. Keep heavier items lower and lighter ones higher.
When you use vertical space, you free horizontal storage for items that cannot be hung, like appliances, stacks of plates, or pantry containers. Remember, the key is to hang only what you use often. Every item you hang should replace something that would otherwise sit in a drawer or on a shelf. Don’t overload your walls. It creates visual clutter and defeats the purpose of organising your kitchen.
Step 5: Clean and organise your fridge
A clean fridge is easier to organise and much easier to maintain, so always make time to clean the fridge. Start by removing anything expired, mouldy, or forgotten at the back of shelves. Leftovers you no longer plan to eat should go as well. This quick clear-out stops food from piling up and frees space immediately.
Wipe shelves and drawers regularly, especially if there have been spills. You do not need to deep clean every time. A quick wipe keeps odours and bacteria under control.
Organise food by type. This will make things easier to find and safer to store. Keep raw ingredients, leftovers, dairy, and ready-to-eat foods in their own zones. Use containers for loose items to prevent leaks and cross-contamination. Clear containers work best, as you can see what needs using up at a glance.
Place frequently used items at eye level and move rarely used items to higher or lower shelves. This reduces overbuying and stops food from being pushed to the back and forgotten.
Step 6: Maintain your organised kitchen
A tidy kitchen will only stay that way if the behaviours that keep it that way are easy to maintain. The idea here isn’t to clean the house every day, but to do minor resets that keep clutter from building up.
Begin with a fast reset at the end of the day. Put things back where they go, clean off the counters, and load or unload the dishwasher. It only takes a few minutes and makes the next day easy.
Check your fridge and cabinets once a week. Look for things that have gotten lost, food that needs to be used up, or containers that are getting too full.
When you bring new things into the kitchen, follow this basic rule. When something new comes in, something old goes out. This stops cabinets from slowly filling up again.
Most essential, always put things back where they belong. A system won’t work until you use it. If you find it hard to put something away, the system needs a tiny change. It’s better to be consistent than perfect. A kitchen that is easy to clean will stay clean for a lot longer than one that looks nice but is hard to clean.
Do you need a helping hand?
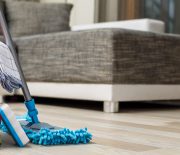
Hire a professional cleaning team!
Takeaways
- Declutter before you organise, or clutter will return
- Group items by how you use them, not how they look
- Give every item a clear home
- Use containers to set limits, not just to tidy shelves
- Make vertical space work for frequently used items
- Keep the fridge organised to reduce waste and mess