Last update: 8 months ago
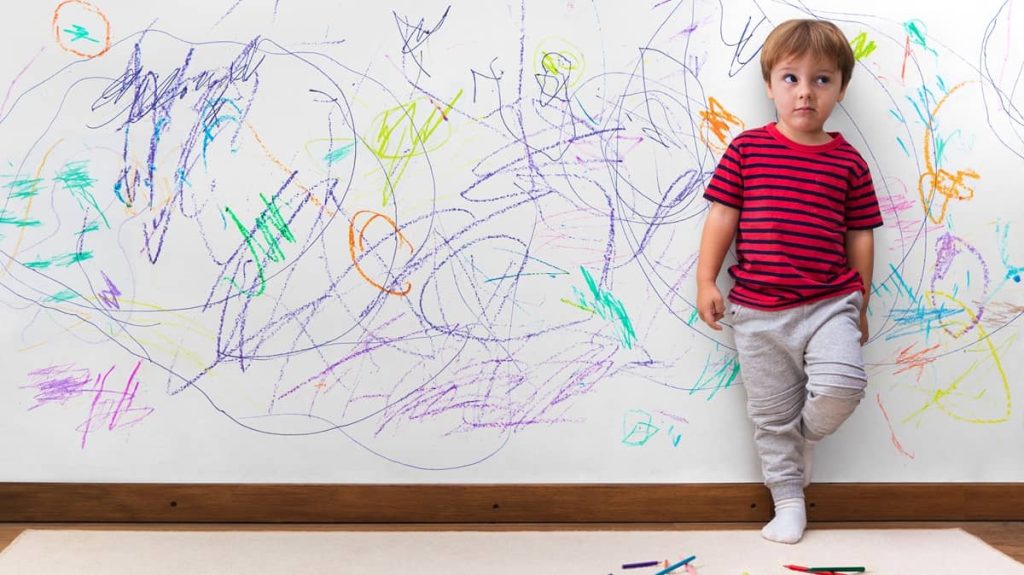
Your child’s imagination knows no bounds, and apparently, neither does their mess. From finger-painted walls to sticker-covered wardrobes, kids have a special talent for leaving their mark (literally).
So, if you’re a parent wondering how to get your bond back without losing your mind, this guide is for you. We’ll show you how to tackle the mess without tears (yours or your kids’).
In this article:
- Erasing crayon and marker stains from the walls
- Tackling sticker residue on walls, furniture or windows
- Dealing with food and drink stains on carpets and upholstery
- Sticky glue and craft stains
- Bathroom and kitchen messes made by little hands
- What can cause stains to become permanent?
- Can professional cleaners help?
Erasing crayon and marker stains from the walls
A pristine wall is a blank canvas to a toddler. While their art might be destined for the fridge, the version on the living room wall needs to go before you move out. The key to erasing these masterpieces without damaging the surface (or your will to live) is to match the cleaning method to the type of wall.
Let’s start by identifying your child’s artistic weapon of choice. Some leave behind easy-to-remove light doodles, others might require a more serious intervention.
- Wax crayon – The classic. Crayon stains are waxy, stubborn, and seem to multiply when you’re not looking. The good news? They’re usually the easiest of the bunch to remove if you go about it the right way.
- Washable marker – Sounds easy, right? “Washable” is in the name! But if it’s been sitting on your wall for weeks, it’s not always a walk in the park. These markers are water-based, so they usually respond well to a gentle cleaning solution if you’re quick.
- Permanent marker – The final boss of wall graffiti. These ink stains are designed to stay forever, and your wall wasn’t part of that plan. Removing them takes a bit more patience and the right products, but it is doable. Just don’t start scrubbing in a panic.
Not all walls are created equal, and neither are the ways you clean them. Here’s how to clean crayon stains from different surfaces without damaging your paint or plaster.
Cleaning painted walls
The most common battleground. Your strategy here depends heavily on the paint’s finish. Gloss and semi-gloss paints are slick and durable, allowing for more robust cleaning. Matte or flat paint, however, is more porous and delicate; aggressive scrubbing can easily lift the paint or create a shiny, “burnished” spot.
1. Baking soda paste
Best for: Wax crayon marks
You’ll need:
- 1 tablespoon of baking soda
- A few drops of water
- Soft sponge or microfiber cloth
Steps:
- Make a paste using 3 parts baking soda to 1 part water. It should be thick enough to stick but not too dry.
- Gently dab the paste onto the crayon marks with your sponge.
- Let it sit for a minute or two—just enough time to question why your toddler had access to a 64-pack of crayons.
- Wipe gently in circular motions. Don’t scrub like you’re trying to sand the wall—just a light touch.
- Wipe away any residue with a damp cloth and admire your now-boring wall.
2. Mayonnaise method
Best for: Waxy crayon stains
You’ll need:
- A small dab of mayonnaise
- Paper towels or a soft cloth
Steps:
- Rub a bit of mayonnaise directly on the crayon mark.
- Let it sit for 5–10 minutes.
- Wipe away with a clean cloth.
- Follow up with a damp cloth to remove any leftover oil.
3. Iron and paper method
Best for: Melted crayon stains that have soaked into the wall.
You’ll need:
- An iron
- A brown paper bag or clean paper towels
- A plastic scraper or old credit card
Steps:
- First, gently scrape off any raised bits of hardened wax with the plastic scraper.
- Set your iron to its lowest heat setting, with NO steam.
- Place a paper bag or a few layers of paper towel over the melted stain.
- Gently press the warm iron over the paper for just a few seconds. The heat will melt the wax, and the paper will absorb it.
- Lift the paper. If you see a waxy spot, you’re winning! Repeat with a clean section of paper until no more wax comes off.
- Clean any faint, oily residue with a damp, soapy cloth.
4. Melamine sponge
Best for: Crayon and washable marker stains
You’ll need:
- Melamine sponge
- Water
Steps:
- Lightly dampen the sponge.
- Test a small, hidden spot to make sure the paint won’t come off.
- Gently rub the stained area in circles.
- Wipe with a clean, damp cloth.
5. WD-40
Best for: Tough stains on semi-gloss or gloss painted walls
You’ll need:
- WD-40 spray
- Soft cloth
- Dish soap and water (for cleanup)
Steps:
- Spray a little WD-40 onto the stained area.
- Let it sit for a minute.
- Wipe clean with a soft cloth.
- Clean the area with soapy water to remove oily residue.
Wallpapered walls
You’ll need:
- White vinegar
- Cotton swabs or a microfibre cloth
- A light touch
Steps:
- Mix one part vinegar with one part water.
- Dip a cotton swab or microfibre cloth into the solution and blot (don’t rub!) the stained area.
- Dab gently until the stain starts to lift.
- Pat dry with a paper towel or a dry cloth.
Brick or textured concrete walls
These porous, rough surfaces are a crayon’s best friend and a parent’s worst nightmare. The wax gets deep into the crevices.
You’ll need:
- A stiff-bristled brush (not wire)
- WD-40 or a strong degreasing dish soap
- A cloth
Steps:
- Spray a small amount of WD-40 onto the stain and let it sit for 5-10 minutes until it penetrates.
- Use the stiff brush to scrub the crayon marks. The bristles will get into the texture where a cloth can’t.
- Wipe away the residue with a cloth.
- You may need to repeat this process. Follow up by cleaning the area with soapy water to remove the oily residue from the WD-40.
What NOT to do (unless you want to repaint)
- Don’t reach for paint-stripping chemicals out of frustration. You’ll end up with a clean spot and a bigger repair job.
- Over-scrubbing can damage paint, wall texture, or even pull wallpaper clean off.
- Avoid coloured sponges or cloths that might leave behind dye.
- Don’t try every method at once. Try one, rinse, repeat if needed.
Tackling sticker residue on walls, furniture or windows
Let’s be honest. Those cute dinosaur stickers were fun… until they became fossilised glue patches on your walls. And while we’re at it, who decided it was a good idea to let kids put stickers on windows, furniture, and literally every surface except the sticker book? Removing sticker residue can feel like peeling regret off your home, one sticky patch at a time.
When a sticker’s glue has had time to “settle in,” it breaks down into a tacky mess that clings harder than your toddler on the first day of daycare. Over time, heat, sun exposure, and pressure from cleaning attempts can actually set the glue further into the surface, making it even tougher to remove.
And there you have it – how to remove stubborn dirt stains left behind by stickers, without leaving your own trail of destruction behind.
Hairdryer heat trick
Best for: Walls, furniture, glass
You’ll need:
- Hairdryer
- Soft cloth or plastic scraper
Steps:
- Turn your hairdryer to medium heat and aim it at the sticker for 30–60 seconds.
- Gently peel the sticker off, starting at a corner.
- If there’s leftover glue, go over the spot with more heat and wipe it with a cloth
Oil-based glue buster
Best for: Painted walls, wooden furniture
You’ll need:
- Vegetable oil, baby oil, or olive oil
- Cotton ball or cloth
- Mild dish soap
Steps:
- Soak a cotton ball in oil and dab it over the sticky spot.
- Let it sit for 5–10 minutes to break down the glue.
- Wipe away with a clean cloth.
- Wash off any leftover oil with a bit of dish soap and warm water.
White vinegar or rubbing alcohol soak
Best for: Glass, tiles, metal surfaces
You’ll need:
- White vinegar or rubbing alcohol
- Spray bottle or cloth
- Plastic scraper (optional)
Steps:
- Spray or dab vinegar/alcohol on the residue.
- Let it sit for 5–10 minutes.
- Use a cloth or plastic scraper to lift the glue.
- Wipe clean with water.
The gentle scrape
Best for: All surfaces (with caution)
You’ll need:
- Plastic scraper, old credit card, or plastic spatula
Steps:
- Once the glue has been softened (with heat or oil), gently scrape it off.
- Go slow and steady—like buttering toast, not chiselling stone.
What NOT to do (unless you want a bigger problem)
- Avoid metal scrapers – They’ll scratch your paint, wood, or glass. Not worth it.
- Skip acetone or nail polish remover – It might dissolve the glue, but it also dissolves finishes, paint, and plastic.
- Don’t mix methods wildly – Trying vinegar, oil, and alcohol all at once = a sticky chemical soup that could damage the surface.
Dealing with food and drink stains on carpets and upholstery
Whether it’s spaghetti bolognese on the couch, orange juice on the carpet, or that mysterious sticky patch on the dining chair that no one wants to claim, food and drink stains are a rite of passage for parents. Unfortunately, they’re also among the most stubborn to clean.
But why are some stains tougher to clean? Some food stains are colourful, sticky and protein-based – basically, a cleaning nightmare. Tomato sauce has natural dyes and oils that cling like your child to a biscuit packet. Juice (especially grape or orange) contains sugars and pigments that love sinking deep into fabric fibres. Chocolate and milk are protein-based and, when not cleaned properly, can also smell… unpleasant. And then there are the mystery stains – old, dried-up patches that feel like part of the furniture now.
No magic wand here, but a few tried-and-tested DIY methods can make a big difference, without resorting to harsh chemicals.
1. Mild detergent + vinegar combo
Best for: Fresh juice or tomato sauce stains on carpets or fabric chairs
Instructions:
- Mix 1 tablespoon of dish soap, 1 tablespoon of white vinegar, and 2 cups of warm water.
- Blot the stain, dab the solution on, blot again, rinse with water, and dry. Great for cleaning cloth dining chairs with stubborn stains.
2. Baking soda overnight
Best for: Old stubborn carpet stains (food stains and mystery smells)
Instructions:
- Make a paste with baking soda and water.
- Spread the mixture generously over the stain and leave it for a few hours.
- Clean up the paste and rinse with water to remove any leftover.
- Repeat or follow with vinegar if needed (optional).
- Sprinkle baking soda over the carpet and leave it overnight if there’s an unpleasant smell.
- Vacuum it up in the morning.
3. Enzyme cleaners for protein stains
Best for: Milk, baby food, yoghurt, and similar messes
Instructions:
- Blot excess, apply the enzyme cleaner, let it sit 10–15 minutes, then blot again. Enzymes break down proteins – perfect for cleaning old stains or stubborn spots detergent won’t fix.
4. Steam or dry cleaning
Best for: Deep-set or widespread stains
Instructions:
- Steam cleaning is great for removing tough carpet stains.
- Dry cleaning suits delicate upholstery like vintage dining chairs or sofas or materials that cannot undergo cleaning with water or liquid detergents.
Sticky glue and craft stains
Craft time is all fun and googly eyes until you’re scraping glue off furniture and finding glitter in your cereal. From PVA to glitter glue, these sticky surprises love to linger, especially if your little artist goes rogue with the supplies.
Cleaning sticky glue and crafts on hard surfaces (tables, tiles, floors)
- Gently scrape dried glue with a plastic scraper or old bank card.
- Soak a cloth in warm, soapy water, then press it over the glue for a few minutes.
- Wipe away the softened glue with the cloth.
- Still sticky? Dab white vinegar on the spot (test first on painted or wood surfaces).
Removing sticky glue and crafts on fabric (sofas, curtains, clothing):
- Let the glue dry completely. Don’t try to wipe it while wet.
- Peel or gently scrape off the top layer.
- Mix 1 tablespoon of laundry detergent with 1 cup of warm water.
- Dab the solution onto the stain with a clean cloth, blotting instead of scrubbing.
- Rinse with a damp cloth and repeat if needed.
How to clean glitter glue or sticky craft gels
- Remove the glue first using the above method.
- Use a lint roller or vacuum with a hose attachment to lift glitter.
- For extra stubborn sparkles, dab the area with play-dough or sticky tack to pick up remaining glitter.
What to avoid while cleaning
- Scrubbing – especially on delicate fabrics or wood.
- Acetone or nail polish remover on plastic, painted, or varnished surfaces. It can cause damage.
- Using heat on glue. It may cause it to set further.
Bathroom and kitchen messes made by little hands
Kids may be small, but their reach is mighty, especially when they’ve just had a snack or washed their hands with a little too much soap. The result? Sticky fingerprints, mysterious smudges, and surprise smears that sneak onto every surface below 1.2 metres.
Common stains you might miss:
- Greasy handprints on fridge doors, cabinet handles, or oven knobs.
- Sticky fingerprints on bathroom tiles, taps, and light switches.
- Smears and smudges on countertops, splashbacks, and drawers—sometimes disguised by the natural light.
- Toothpaste splatters around sinks and on mirrors.
- Mild soap scum or watermarks from eager hand-washing sessions.
The good news is that most of these stains can be easily erased with a simple multipurpose cleaner made with white vinegar and water. Just prepare the spray by mixing 1 part white vinegar and 1 part warm water, and spray away. If you want to add an extra kick, simply add a few drops of dish soap, and you’re good to go.
You can use your homemade cleaner to disinfect cabinets and doors, kitchen or bathroom tiles (these can be quite messy sometimes, so additionally you can use a baking soda paste (3 parts baking soda to 1 part water), apply it with a cloth, let sit briefly, and rinse well), laminate countertops, glass and mirrors, etc.
When it comes to stainless steel appliances, it’s better to stick to a mixture of dish soap and water. Dampen a cloth, and wipe with the grain of the steel. Follow up with a dry microfiber cloth for shine.
What to avoid:
- Bleach on coloured surfaces as it can discolour or damage them.
- Using white vinegar on marble, limestone or other natural stone surfaces because it can damage them.
- Abrasive scrubbing pads can scratch shiny finishes.
- Ignoring handles and switches because they’re germ hotspots!
What can cause stains to become permanent?
It’s a frustrating reality: sometimes, no matter how hard you scrub, a stain just won’t budge. The truth is that while prompt action is always best, removing deeply set-in stains is significantly more challenging, and in some cases, impossible without damaging the surface.
This often happens due to a combination of factors related to the age and nature of the stain, as well as the type of surface it’s on.
- Age of the stain – The longer a stain sits, the more time it has to bond with the fibres of a carpet or the porous surface of tiles. Fresh stains are always easier to remove. Over time, the spilled substance can dry, oxidise, or chemically react with the material, making it virtually impossible to lift without damaging the surface itself.
- Heat exposure – Applying heat to a stain (e.g., using hot water, a steam cleaner, or putting a stained item in a dryer) before the stain is fully removed can “set” it. Heat can cause the staining agent to bond more deeply and permanently with the material.
- Chemical reactions – Certain substances, especially those with strong dyes or chemicals (like some medications, inks, or even harsh cleaning products used incorrectly), can cause a chemical change in the material, leading to permanent discolouration or damage.
- Type of material – Porous materials like natural stone, unsealed grout, untreated wood, and certain carpet fibres (especially natural ones like wool) are more susceptible to permanent staining because they absorb liquids deeply. Synthetic fibres in carpets are often more resistant but can still be stained by strong dyes or chemicals.
Most common areas where stains could appear and the most common culprits that may cause permanent staining are: carpets (urine stains, red wine/juice, ink/dyes, oily stains), grout (mould/mildew, rust stains, dye transfer), hardwood floors (again urine), countertops (food dyes, bleaching chemicals), walls (oily stains, permanent marker/crayon).
Can professional cleaners help?
Even when facing stubborn or seemingly permanent stains left behind by tiny culprits, professional cleaners can be your greatest ally, especially for end of lease cleaning. The decision to hire them often comes down to two primary benefits: saving precious time during a stressful move and significantly reducing the risk of losing your bond due to cleaning issues.
Here’s how their expertise truly benefits families navigating a move, whether you’re tackling kid-specific messes, general wear and tear, or even the unique challenges that come with a pet-friendly rental:
- Effective stain removal (and the best for old, stubborn stains) – Professionals possess specialised cleaning products and advanced techniques that aren’t typically available to the average person. They can offer targeted treatments for things like mould, odours, and tough stains, delivering a deeper clean that meets landlord standards. The cleaners understand different fabric and surface types and know precisely which solutions and methods (like hot water extraction for carpets or targeted chemical treatments for urine stains) will be most effective without causing damage.
- Time-saving during a stressful move – Moving is hectic, especially with kids. Professional cleaners handle the deep clean so you can focus on packing and settling in, easing the stress during an already busy time.
- Bond back guarantee – Many end of lease cleaners offer a bond back guarantee, meaning they’ll return to re-clean if your landlord isn’t satisfied, giving you peace of mind and a better chance of getting your full deposit back.
- Addressing overlooked areas – Professionals work with comprehensive checklists that cover every nook and cranny, including often-missed spots like skirting boards, inside cupboards, light fixtures, and window tracks. This attention to detail is critical for passing final inspections.
- Health and hygiene – A professional clean ensures the property is not just visually clean but also hygienically clean, free from allergens, bacteria, and lingering pet odours, which is particularly important for the next tenants and can be a point of contention for landlords.
Stress-free end of lease cleaning for busy families!
We handle the deep clean, so you can focus on the move.
Takeaways
- Tackle kid stains smartly. Quick action with the right DIY methods can remove most crayon, sticker, and food messes, preventing them from becoming permanent.
- Know stain limits: Some stains, especially older ones or those on porous surfaces, can become permanent regardless of cleaning efforts.
- Pros secure your bond. For tough stains and a stress-free move, professional end-of-lease cleaning is a worthy investment, significantly boosting your bond return chances.
- Clean smarter, move calmer. Strategic cleaning ensures a smooth exit, letting you focus on your family’s new beginning.