Last update: 2 years ago
How many times have you been frustrated because a supposedly trusty vacuum cleaner suddenly stopped working? It’s a scenario all too familiar. The blame game ensues, but the real culprit is neglecting maintenance basics. Neglected vacuums can seem useless with tangled cords and clogged filters. In most cases, a simple tune-up can breathe new life into your once “broken” appliance.
With this comprehensive guide, we’ll take you through every aspect of how to clean vacuum cleaner. We’ll explain to you how to clean the bin and internal components, change the filters and get rid of pesky blockages and tangled hair so your vacuum cleaner becomes a hygienic sanctuary.
Tools needed for deep cleaning
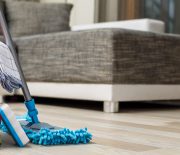
Whenever you ever feel like your vacuum is just pushing dirt around your floor, it’s a clear indicator that it’s time for some maintenance. Your vacuum needs a little cleaning. Moreover, when it’s clogged up with debris, your vacuum performance gets slower and with less suction.
Cleaning your vacuum doesn’t demand any fancy tools or supplies.
What you will need:
- Scissors for cutting away hair from your brush roller
- Disinfectant spray for sanitisation
- Can of compressed air for dusting
- Cleaning solution of your choice (dish soap, vinegar, etc.)
- Hot water
- Microfiber cloth to wipe down your vacuum
- Pipe cleaners for reaching difficult spots
- Broom handle to clean the hose of clogs
- Cleaning brush
- Screwdriver or drill to help disassemble the vacuum, when necessary.
- Flashlight to help find clogs
- Work gloves to keep your hands clean
- Mask to keep dust out of your nose
- Essential oil (optional)
For some vacuums:
- New bag – Some vacuums still use bags, but most are bagless now.
- New filter – Modern vacuum cleaners use washable filters, but some still use disposables.
- New belt – Some vacuums still require replacement belts occasionally, even though most use lifetime (or at least very long-lasting) belts to drive the brush roll.
Maintaining your vacuum is essential for its longevity and efficiency, including a deep clean vacuum session. Basic maintenance takes 10 to 30 minutes, plus 24 hours for parts to dry after rinsing. Some repairs might take several hours to complete.
Not every part of your vacuum requires cleaning after every use. However, some require more frequent cleaning.
- Brushes and bristles – Keep them clean after every use to prevent debris and dirt from collecting.
- Vacuum canister – Keep it empty after every few uses to ensure optimal suction power and prevent clogs.
- Filters – Replace or clean them at least once a month for efficient air filtration.
- Deep clean – Perform it every 12 to 18 months for best results.
Step-by-step guide to deep clean your vacuum cleaner
Cleaning your vacuum cleaner might seem like a big task, but it’s actually quite manageable with a little effort. Here is a complete guide on how to clean your vacuum cleaner:
Step 1. Unplug the vacuum cleaner before starting any cleaning process
Safety first! Always switch off and unplug the vacuum cleaner before you start cleaning. Check the entrance to the machine/top of the bag for further debris as well as removing any blockages in the tube.
Before performing any maintenance on your vacuum cleaner, be sure to read the instructions. They will show you how to access and replace the filters, which parts you can wash, and other helpful info.
Step 2. Remove dustbin or bag and dispose of contents properly.
Many people don’t understand how important this step is, even though it seems obvious. They overlook the fact that vacuum cleaners can become too full to function properly. They don’t realise that simply emptying the vacuum is enough. In a vacuum, air must flow through the bag or bin. An overstuffed bag or bin blocks this flow.
If you have a bagged vacuum cleaner, here is how to clean the bag:
- Remove the vacuum cleaner bag carefully and dispose of it properly. If reusable, empty its contents into the trash.
- Inspect the bag compartment using a flashlight for any debris or dust buildup.
- Apply compressed air to remove anything stuck in the corners.
- Use a soft brush attachment to eliminate loose dirt or debris.
- Wash the interior of the bag compartment with a damp cloth, paying particular attention to corners.
- Replace the bag according to the manual.
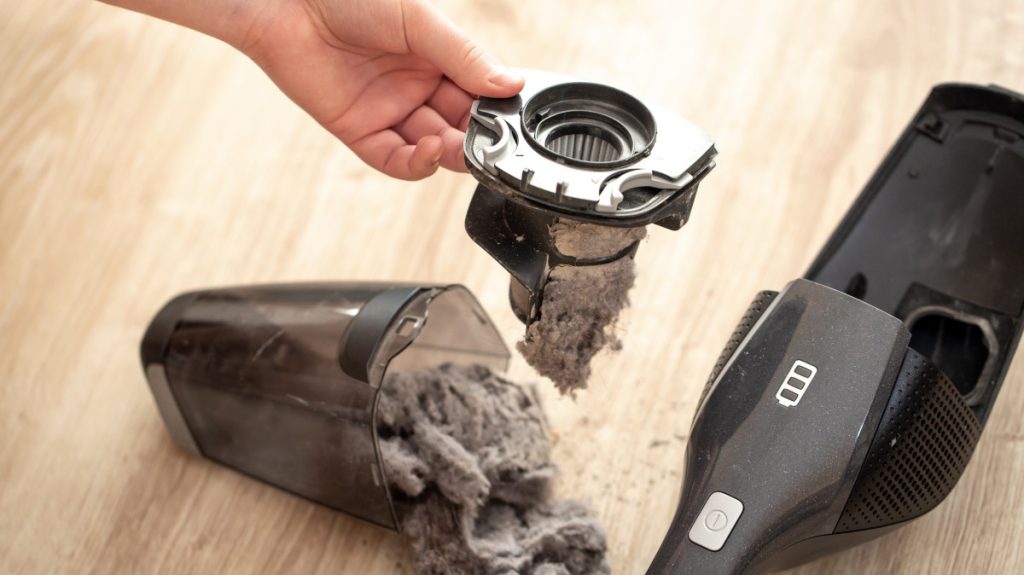
For a bagless machine, here is how to clean the dustbin:
- Make sure to empty the dustbin (canister) after each use.
- Wipe the inside of it with a dry microfiber cloth to remove any residues.
- Wash the dustbin if it is too dirty in the sink with warm, soapy water or a cleaning solution.
- Scrub it thoroughly with a cleaning brush, paying particular attention to those gunky corners where most bacteria lurk.
- Let it dry completely before using it.
Step 3. Clean the filters
If it is your first time cleaning your vacuum, you might find it a little challenging. However, with practice it will become easier.
So, after taking care of the bag, the next step is cleaning the filter. Dust can clog even the most decent vacuum filter, and suction will be lost. Before you even realise it, the dirty filter will slowly reduce your vacuum’s cleaning ability. Thus, clean your vacuum filters regularly to maintain optimal performance.
How to clean your filter depends on whether it is washable or non-washable. Follow the manual for specific information. As an example, Tineco recommends cleaning its stick vacuums’ filters every few uses, while Miele recommends changing its vacuum filters every fourth bag change. You can typically wait a bit longer between filter services, and the vacuum will keep running, but the delay in maintenance will eventually cause the vacuum to malfunction.
Nevertheless, clean your vacuum cleaner filter once a month or more, especially if you vacuum often because your kids spill food on carpets and your pets shed fur.
Here’s how to care for different types of filters.
HEPA filter care
HEPA filters are renowned for their high efficiency in trapping harmful particles from the floor and preventing microorganisms and bacteria from escaping the filter’s ventilation system. This makes them a top choice in filter technology. To clean your HEPA filter, refer to the manual to determine if it’s washable or requires replacement. Then, carefully remove the filter and tap it against a hard surface to dislodge any dust particles. Do this over a trash can. Then, if washable, rinse it under the sink tap using warm water. Let it dry completely before reinserting it into the vacuum.
Foam filter care
Foam filters are a popular choice in vacuum cleaners for their ability to capture various particles like dust, paper, hair, and debris. Typically, they are washable filters, making maintenance simple. To clean, place the filter in a bowl of warm water with a bit of mild dish soap. Let it soak for a few minutes to loosen any dirt or grime. That way, dirt and debris will loose. Then, rinse the foam filter thoroughly under running water, gently squeezing it to remove any trapped particles. Let it dry for a few hours.
Paper filter care
Filters with pleated paper cartridges are called paper vacuum filters. They are designed to capture small particles, germs, dust, and powders in the air during the vacuuming process. They are cheap and disposable. Although some of them are made from a non-woven synthetic material making them washable and reusable. For disposable ones, it is not recommended to clean them in water. Throw them out according to the manual. Extend their lifespan by gently brushing off dirt, dust, and debris or use low-pressure compressed air to remove fine dust and dirt particles. Tap the filter against the bin or the side of your kitchen sink to dislodge and remove dust, then replace it.
Some companies recommend changing their vacuums based on the number of times that the debris bag has been emptied or swapped.
Step 4. Clean vacuum brushes or roller bars
Cleaning a vacuum cleaner’s roller bar can be quite challenging. Additionally, it tends to harbour a significant amount of bacteria and viruses, making it essential to clean regularly. Always put on your mask and gloves when handling it. Here are the steps::
- Remove the brush head.
Most vacuum cleaners allow removing the roller bars and brush heads to make the cleaning easier. - Clean the brush head.
Trim the brush first using your hands. Brush heads with indents allow scissors to guide through hair and threads without cutting the bristles. But be careful not to cut the bristles! If you are wondering on how to clean Miele vacuum head, there is no place for worries. It is in the same way as most models. In case it has removable parts, such as brushes or attachments, remove them and clean them separately.
When it comes to how to clean Dyson vacuum head, the situation is similar. Take out the main brush bar, then lift out the rear brush bar. Wash both brush bars in cold water and remove as much water as you can. Let the brush bars dry for at least 24 hours until completely dry. - Check for blockage in the brush head.
Hair wrapped around the machine draws more power, draining the battery faster and straining the motor. Use a broom handle to gently push a straightener through your vacuum’s hose to dislodge any clogs. Avoid using anything sharp since it may puncture the hose. Check the transfer points on the vacuum for clogs, such as the area where debris is sucked into the vacuum head on a canister vacuum and the area where the stick meets the bin on a stick vacuum. To see if anything is clogged, shine a flashlight deep inside the machine and use a pipe cleaner to clear the clogs. Compressed air can work as well.
Step 5. Clean the interior and exterior of your vacuum cleaner
Clean the lower part of the brush with the toothbrush you used for the dustbin.
Handle the brush gently while doing so to prevent damage. If your brush is able to be removed, then you can clean it in detail. Soak the brush for about an hour in a cleaning solution, or use disinfectant as you scrub. Dry it thoroughly before reinstalling it.
Clean with a microfiber cloth the interior and exterior of your vacuum cleaner. Be careful not to get water on any sensitive electronic components. Also, too vigorously scrubbing can permanently scratch vacuum surfaces.
Disinfection is an important part of deep cleaning. However, always check the manual first. Certain vacuum cleaner manufacturers advise against using detergents or chemicals for cleaning. They suggest using water or a slightly damp cloth instead.
The best disinfectant to use is isopropyl alcohol since it’s effective and fast drying, but any household disinfectant liquid or spray will do. Make sure no disinfectant gets into the motor compartment.
Step 6. Clean the attachments
Vacuums usually come with a variety of accessories. Clean them out as well in order to bring everything up to the same level of cleanliness. Skip any parts you rarely use. Use the same strategy you used to clean the larger brush to clean attachments that have brushes.
Brushing accessories that you use more often would be a good idea, especially if they’re covered in dirt.
Place small accessories out to dry first. It may take longer for these to dry out, depending on your vacuum.
Step 7. Reassemble
After a day, wipe the interior with a dry cloth or microfiber towel to ensure that no water remains. Reassemble the vacuum, and you’re ready to go!
How to get rid of and prevent smells in your vacuum cleaner
A common complaint among vacuum cleaner users is odour. It is often due to infrequent emptying or organic debris. Yes, you hear right. When vacuuming food particles or other organic debris, it could result in mould growth. That actually creates the smell. Get the habit of cleaning the dust bag or container frequently. This alone can reduce odour. (Regularly cleaning out the dust bag or container can help reduce odours.)
Here are some all-natural, inexpensive aromatic tricks that you can try to freshen your room and deodorise your vacuum more effectively.
- Baking soda – With it’s superpowers, it absorbs the unpleasant odours. Sprinkle a few teaspoons into your vacuum’s dust bag or bin to keep it smelling fresh.
- Cinnamon – For a delightful autumnal fragrance, sprinkle 12 tablespoons of cinnamon powder inside your dust bag or bin before vacuuming.
- Essential oils – Spritz a few drops of essential oil into the canister or filter after cleaning it. Thyme and lemongrass are particularly good at fighting mould.
- Air fresheners – Several vacuum cleaners are available with air fresheners. If yours has one, it may come in the form of beads that are added to the bag.
Why regular cleaning is essential
Cleaning the vacuum cleaner isn’t hard. Just perform deep cleaning at least once a month to keep it in top condition. However, if you notice it’s not working as well as you’d like, if it smells, or if you’ve used it for an extra dirty job, you might want to clean it sooner.
According to a 2013 study called “Microbial contents of vacuum cleaner bag dust and emitted bioaerosols and their implications for human exposure indoors”, vacuum cleaners that haven’t been cleaned properly can spread mould and bacteria. Inhaling mould- and bacteria-laden dust can make you sick. The worst is that if you suffer from allergies, those dust can worsen your condition. So, constantly cleaning is a must.
You can consider the help of our regular cleaning service to maintain your vacuum cleaner and other household appliances. Our experienced cleaners are equipped with the knowledge and tools to efficiently clean and sanitise your home, including vacuum cleaners, so that they can be in top condition for longer.
In cases when the power keeps cutting out, or the vacuum just won’t start, there are a few other possibilities to consider:
- Batteries are dead (on battery-powered vacuums), or there is a fault in the charging system, such as dirty charging contacts or a broken power adapter.
- Hoses are cracked and leak air, which reduces suction.
- Brushes either have broken belts (cheap to replace) or transmissions (more expensive).
- The bag, cyclone tips, or filter have a “phantom” clog. It can be caused by flour, plaster dust, and other fine, white, gummy debris obstructing the airflow.
YouTube has tons of DIY repair videos that can help you solve these problems. Sometimes, however, it’s best to bring your vacuum into a repair shop and let an experienced technician take a look at it.
Do you need a helping hand?
Hire a professional cleaning team!
Takeaways
- Regular deep cleaning removes dirt, debris, and blockages from various components of the vacuum cleaner for optimal suction power and efficiency.
- It prolongs its lifespan and reduces the need for expensive repairs.
- A dirty vacuum cleaner can spread mould and bacteria, potentially making you sick, especially if you have allergies. Deep cleaning ensures a hygienic environment.